Last Updated on June 29, 2022 by Rebecca Huff
Sprouts, microgreens, and shoots are often used interchangeably but they are not all the same thing. So, first let's take a look at the difference between the three words before we dive into how to grow sprouts and microgreens (or shoots!) All sprouts, microgreens, and shoots begin as a seed.
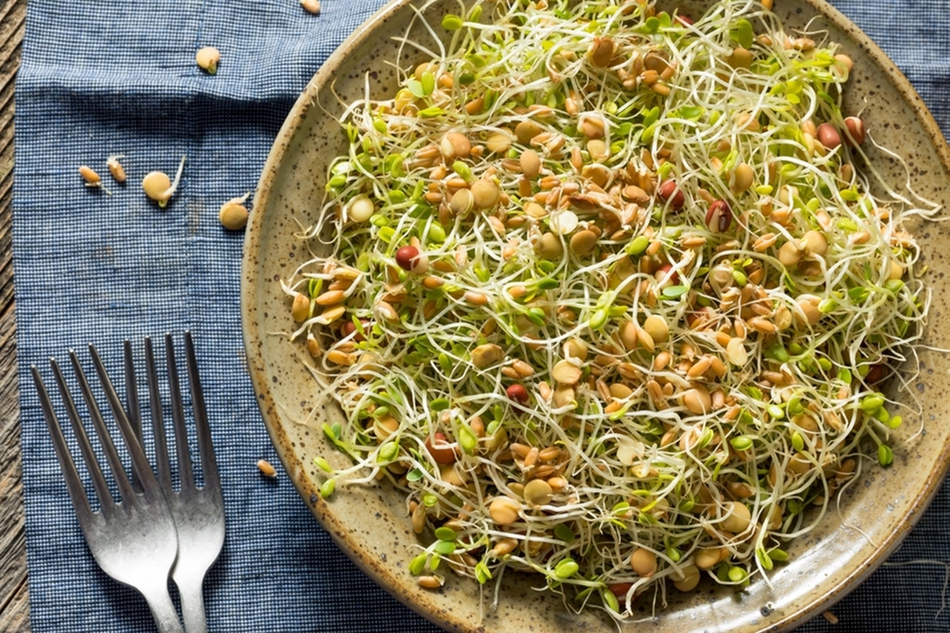
Sprouts – Grown from a seed without soil. The entire seed and sprout is consumed in one piece.
Microgreens – Cut from seeds grown in a medium such as a special type of soil. Microgreens and shoots are basically the same in that they both require a growing medium and the seed is not eaten. Just the “shoot” from the seed. Microgreens are usually harvested along with one or more sets of leaves, whereas shoots may be eaten before the first set of leaves appear.
Shoots – Very similar to sprouts, however, shoots can be cut from the same seed multiple times. For example, pea shoots are grown from peas that grow inside pods. They are typically cut just above soil level and harvested at least twice, sometimes three times. They make a delicious salad or addition to stir fry.
Microgreens and Shoots are both harvested by cutting. Sprouts are eaten whole, including the tiny root system, which sometimes looks like fine fuzzy growth at the bottom.

How to Grow Sprouts and Microgreens at Home
You've probably experienced a bit of sticker shock buying them at the grocery store. With a small investment and very little effort, you'll become an expert at growing them at home.
Sprouts are fairly easy to grow as well but have a wider margin for error than microgreens.
To grow sprouts, seeds are first soaked in water, then drained, and rinsed frequently while they grow. Sprouts require humid conditions to sprout and grow; ironically, these conditions are also ideal for certain bacteria's growth. Like most fresh produce, there is a risk of bacteria.
Growing in a small space
To get started you'll need sprouting seeds and a jar with a mesh lid, or you can also use a bit of cheesecloth. Some people sprout seeds inside a mesh bag. You do not need soil of any kind to grow sprouts.
Even the smallest studio apartments usually have enough room for growing sprouts. Microgreen trays take up more room, but if you have space on a counter or a wire shelf, that's perfect.
Choosing the Right Containers and Seeds to sprout
Choose organic seeds for sprouting that haven't been sprayed with a fungicide. Look for seeds labeled non-GMO or organic seeds for sprouting or microgreens; these have a higher germination rate, and sometimes, they will be listed on the package.
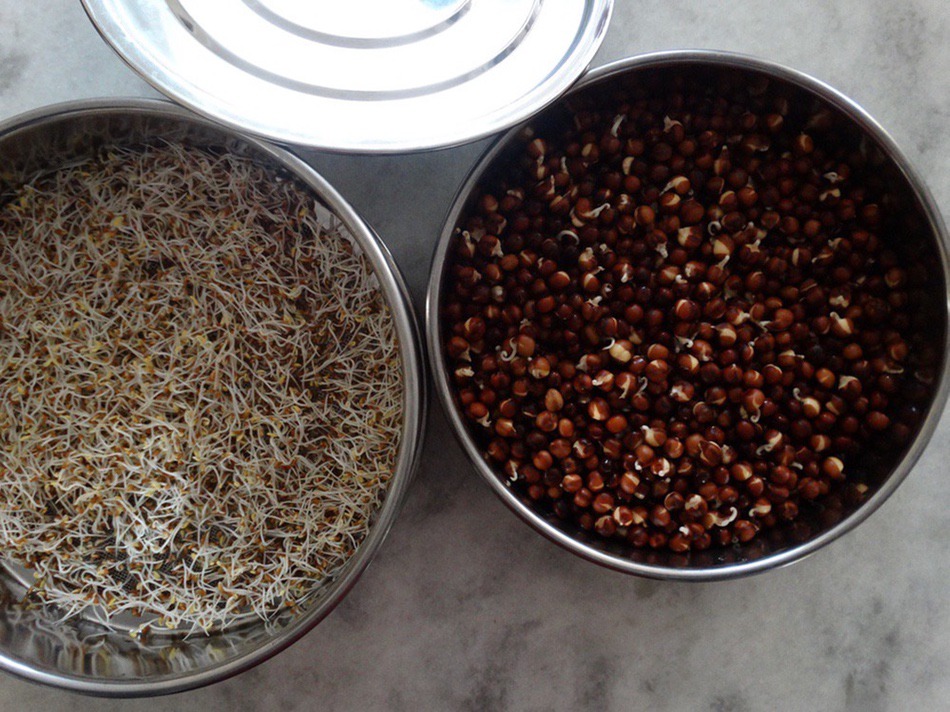
You can use a decorative jar or stainless steel tray for growing sprouts.
The Stainless Steel Sprouting Tray
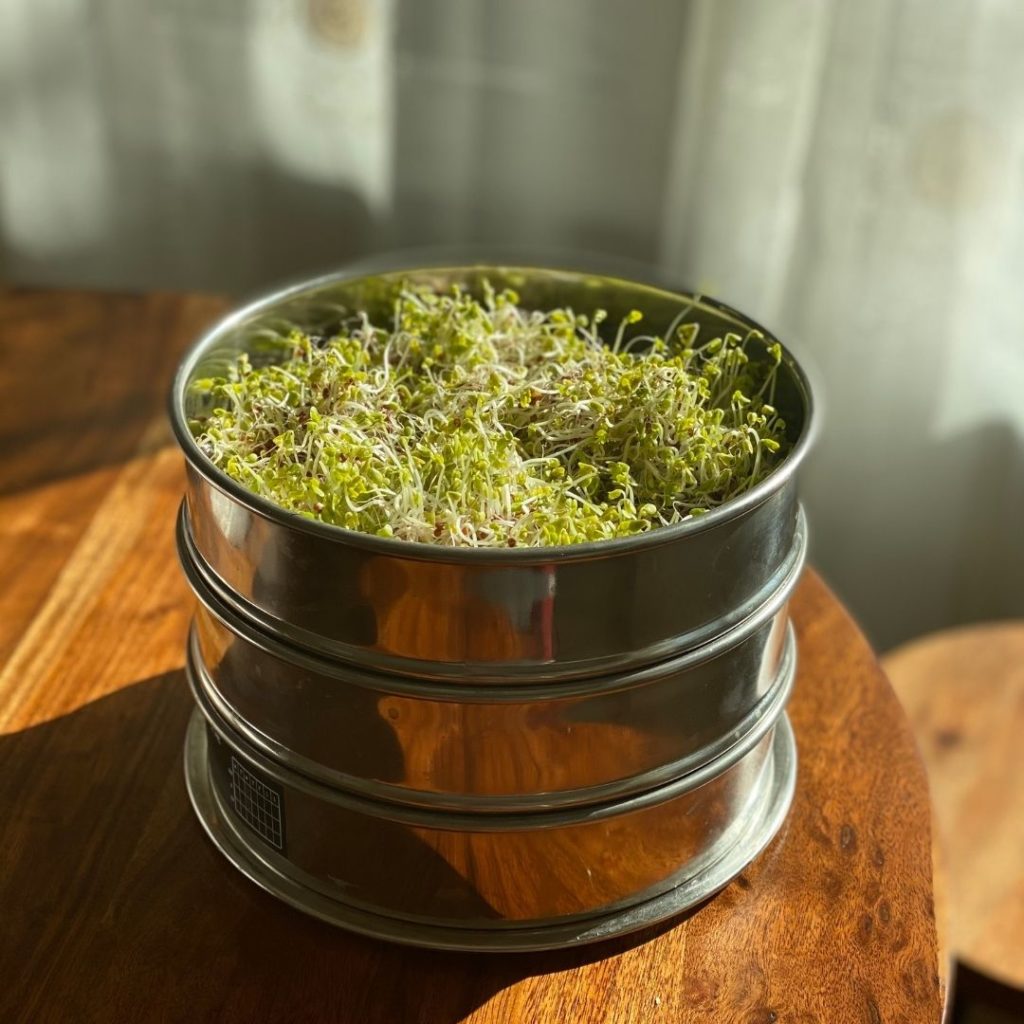
The stainless steel sprouting tray came with a water tray, mesh tray for draining, and a stainless steel lid. It also had a rinse me label sticker which I do not use, a re-usable pen, and a cotton sprouting bag. At the time of this writing the sprouting tray I purchased here comes with a 3 year warranty.
- Wash the parts with warm soapy water.
- Soak seeds in fresh water for 8-12 hours.
- Pour the seeds into the mesh sprouting tray, spread evenly, rinse I use my sink sprayer.
- Allow seeds to grow under the lid. You may remove the lid when the sprouts start growing leaves. This will allow them to turn a bit more green.
- Rinse sprouts and their ready to eat. (I use a salad spinner to get all the water off mine before putting them on a sandwich, etc.)
- Store sprouts in the refrigerator.
You can find my favorite sprouting tools in my Amazon Idea List for Sprouts.
Decorative Hanging Sprout Jar
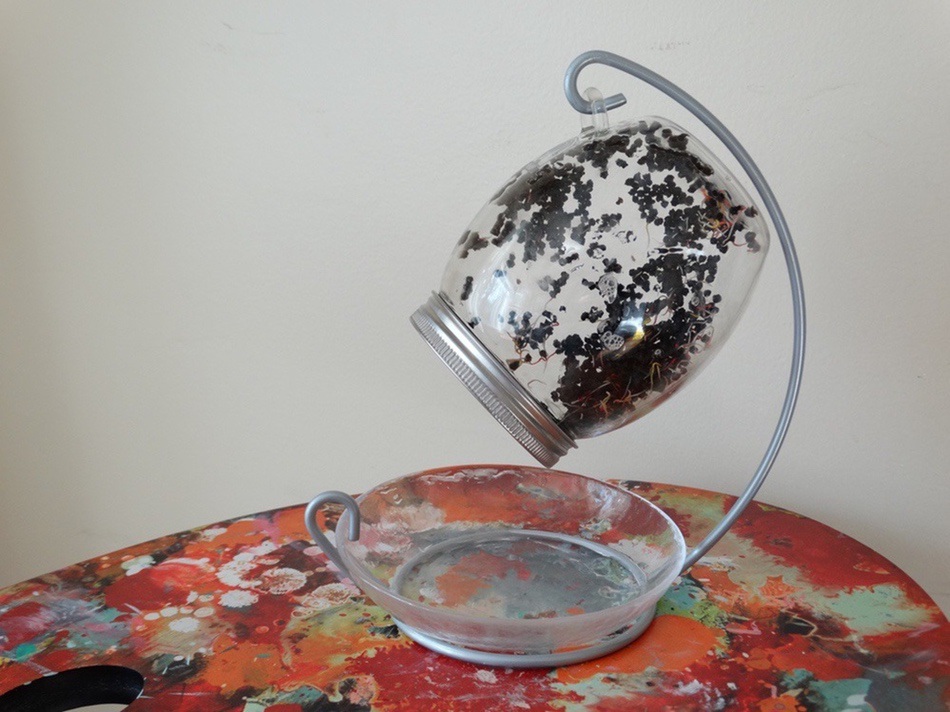
With this sprouting jar, I always hold the base in the palm of my hand. I don't pick it up by the lid or the little piece of glass used for hooking it onto the base. Keep in mind, water makes the glass more slippery, so be careful not to drop the jar!
The lid on this jar is stainless steel and should not rust, but if it does get dirty, soak it in distilled white vinegar. Actually, I rinse mine in vinegar between uses, so mine has never turned brown.
The sprouts will turn green faster if they are exposed to a bit of sunlight.
- Put the stand wherever you'll be keeping it.
- Add the glass drip tray to the bottom of the stand.
- Soak seeds in the jar for 8-12 hours (or as recommended on your seed pack)
- Drain and rinse 2-3 times.
- Hook the jar with seeds (upside down) onto the stand.
- Rinse twice daily while the sprouts grow for 3-5 days. (If it's hot inside your home, rinse more frequently.)
- The sprouts are ready to eat! I put mine in a salad spinner to get off the excess water before I eat and store them.
- Refrigerate sprouts.
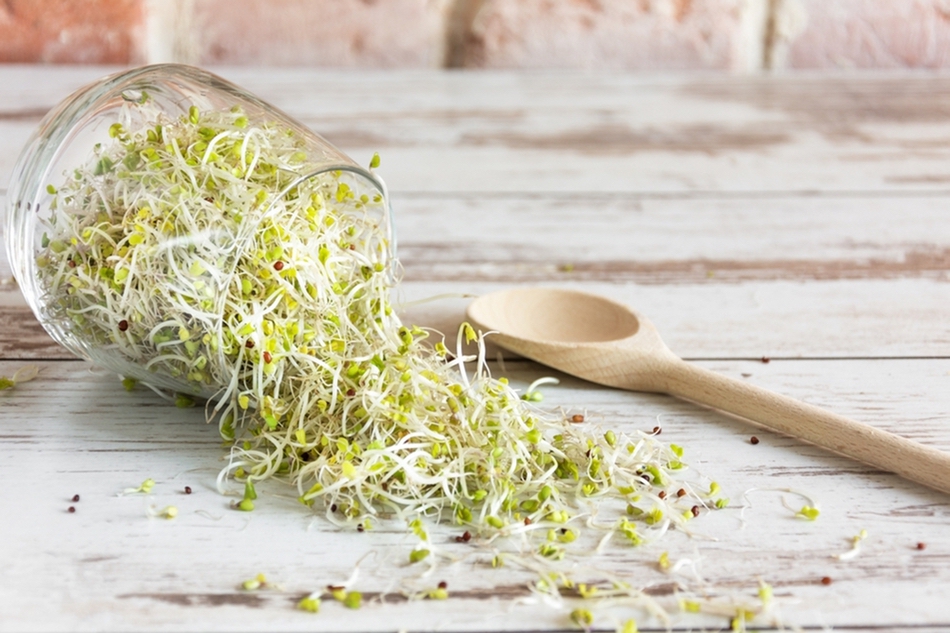
How to start growing sprouts
- Use clean seeds and sterilize the sprouting jar *see methods below
- Rinse with clean water
- Soak for 12 hours
- Remove floating seeds as they likely won't sprout.
- Drain (if they don't drain well, they may rot and it also helps prevent bacteria from growing)
- Rinse 2-3 times per day for 4-5 days using clean cold water.
- Day 5 or 6, depending on the type of seed, expose to sunlight so the sprouts can turn green.
- Harvest and eat when sprouts turn green and have their seed leaves, or wait a bit longer until thy get their first set of true leaves. (Cotyledon)
- In between batches, thoroughly clean your sprouting jar or containers to prevent contamination.
Sterilizing Sprouting Jars and Trays
There are several methods recommended for sterilizing your equipment.
- If you use canning jars, you can boil them for 10 minutes.
- Run jars and trays through the dishwasher (check manufacturer instructions first!)
Disinfecting Seeds
- Soak in distilled white vinegar or apple cider vinegar and hot water at a ration of 1 cup water to 2 tablespoons of vinegar. (rinse fully with cool water before sprouting
- Soak in 1 cup water + 1 teaspoon of bleach (rinse fully with cool water before sprouting)
- The most simple and effective way to disinfect 1 heaping tablespoon of sprout seeds is to use either 2 tablespoons of cider vinegar or 1 teaspoon bleach, per 1 cup hot water. Let the seeds soak for 15 minutes in a mason jar. Rinse seeds thoroughly with cool water until you not longer smell bleach or vinegar.
- Soak seeds in a airtight container filled with 3% hydrogen peroxide solution for around four hours
Safe Growing and Storing
If the weather is hot, you might want to rinse more frequently, 3-4 times per day. In cooler weather, you can use a seed mat to keep them warm enough to germinate. If your home is kept at a temperature that is comfortable for you, this probably won't be necessary.
Seeds germinate within a specific temperature range; most between 68°F – 73°F. Refer to the seed packet for directions. IN the winter, if your home is cold, you might want to use a heat mat if your seeds aren't germinating.
When using a jar, don't overcrowd the seeds; they need oxygen to stay healthy. Overcrowding may lead to slimy, smell sprouts that you won't want to eat. Too many seeds in a jar may cause some of them not to germinate. (This happened to me with the rainbow chard I mentioned above, which I threw into my garden and later harvested as full-grown plants.
After rinsing rotate the jar in your hands so that the seeds have a chance to move around. This will prevent clumps of sprouts from bunching up.
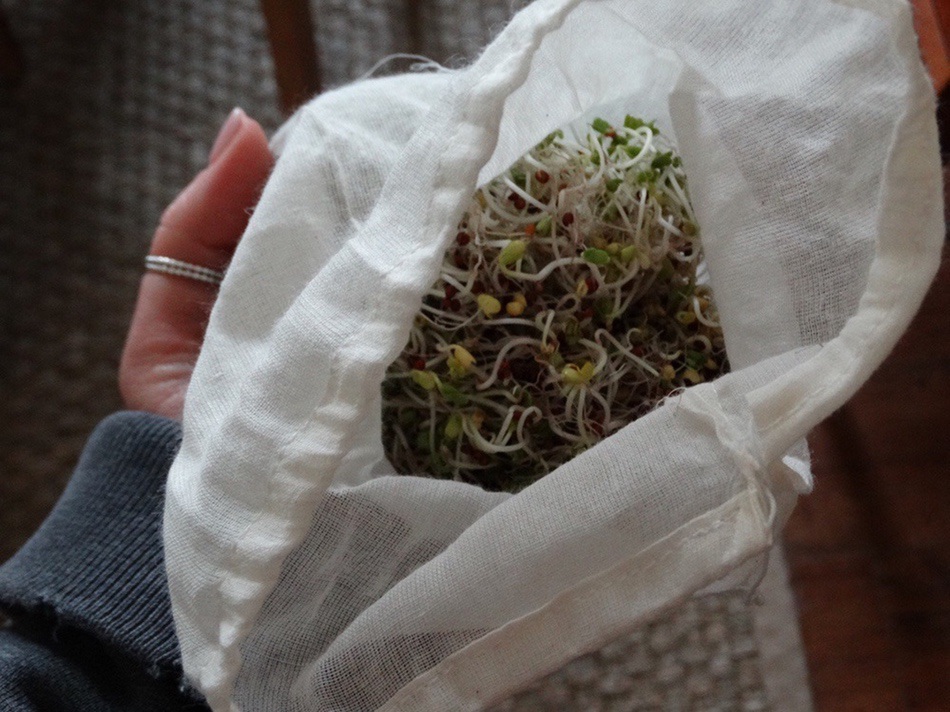
To store sprouts, they should be kept in the fridge in a container that breathes. A muslin bag works well. Rinse the sprouts, gently shake off excess water, and let them air dry before putting them into a container. You do not want your sprouts sitting in water as they will go bad.
Grow Microgreens at Home
Choose your microgreen mix, trays, growing medium and get ready to grow microgreens at home. With microgreens, you can keep the surface of the soil moist with a small watering can or a spray bottle. Some people go all out and use a hydroponic system to grow and harvest wheatgrass so they can juice it every day.
Supplies to Grow Microgreens and Shoots
- Trays – you can use seed starting trays, just make sure you've disinfected them.
- Growing Medium such as coconut coir
- Seeds
You will need to choose wisely, don't just grab the first random potting soil you find.
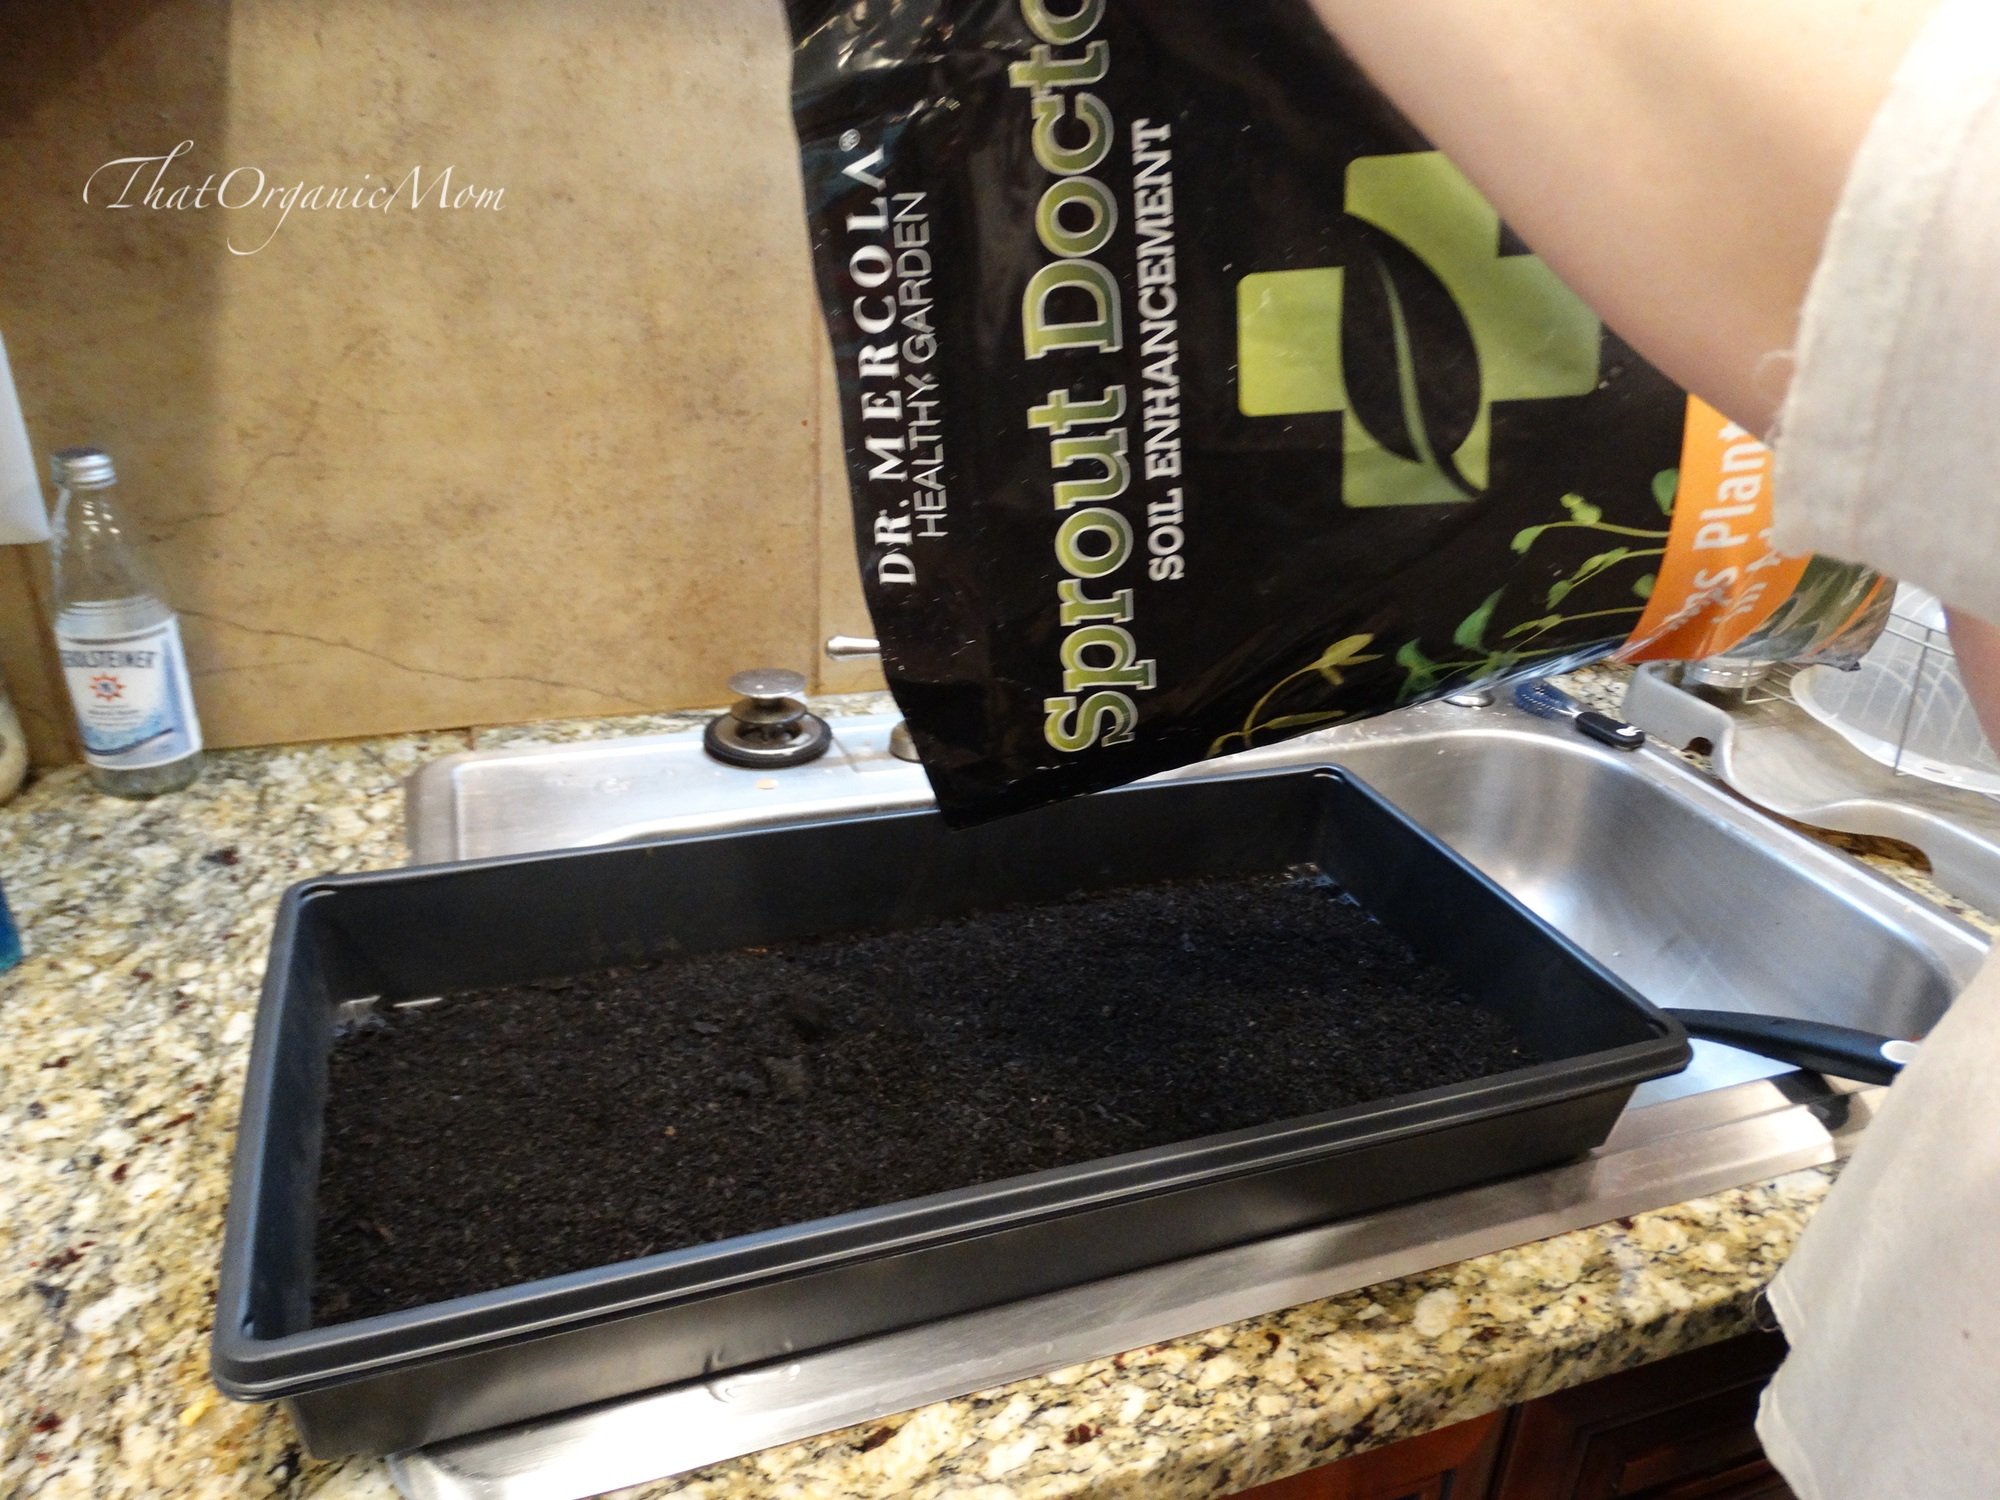
The growing medium I use the first time was a blend of peat moss, coconut coir, sterilized compost, mixed with with 20% perlite. Don't worry when you look at this blend, those little white balls are not styrofoam. Perlite is superheated volcanic rock that has no negative impact on the environment.
Simple black trays work just fine. You can often find these at local nurseries or plant shops. Alternatively, you can buy the black seed trays on Amazon and save the trip. Put down a thin layer of growing medium, add microgreen seed, then add another light layer of soil. You'll want your seeds to be just below the soil line.
It is not necessary to have grow lights, however, if you have a home without windows or very little sunlight, this can help. We've used grow lights to grow pea shoots and other microgreens at home.
Pea Shoots
Pea shoots are refreshing and sweet, which means they're delicious in salads, soups and stirfries.
You can grow pea shoots without the medium using special containers.
After soaking a handful of dry peas in water for 12 hours, plump seeds are placed in the moisten earthenware sprouter GAIA (no soil) and covered with the lid of the sprouter. After few days the peas start to germinate. They are watered once to twice a day. The GAIA Clay Sprouter provides the right humid but breathable environment to ensure healthy and steady growth. When the grown shoots cannot be covered with the lid, the sprouter is left open and placed on a sunny spot. Plant roots will grow through the drainage holes on the bottom of the GAIA clay tray. The roots use all the extra water that gathers in the base part of the sprouter.
I always grow mine in a growing medium. You can find Pea Seeds online or look for them locally.
Pea Shoot Salad Recipe (includes details about why you'd want to eat more microgreens and sprouts) is one of my favorite salads.
Growing Pea Shoots
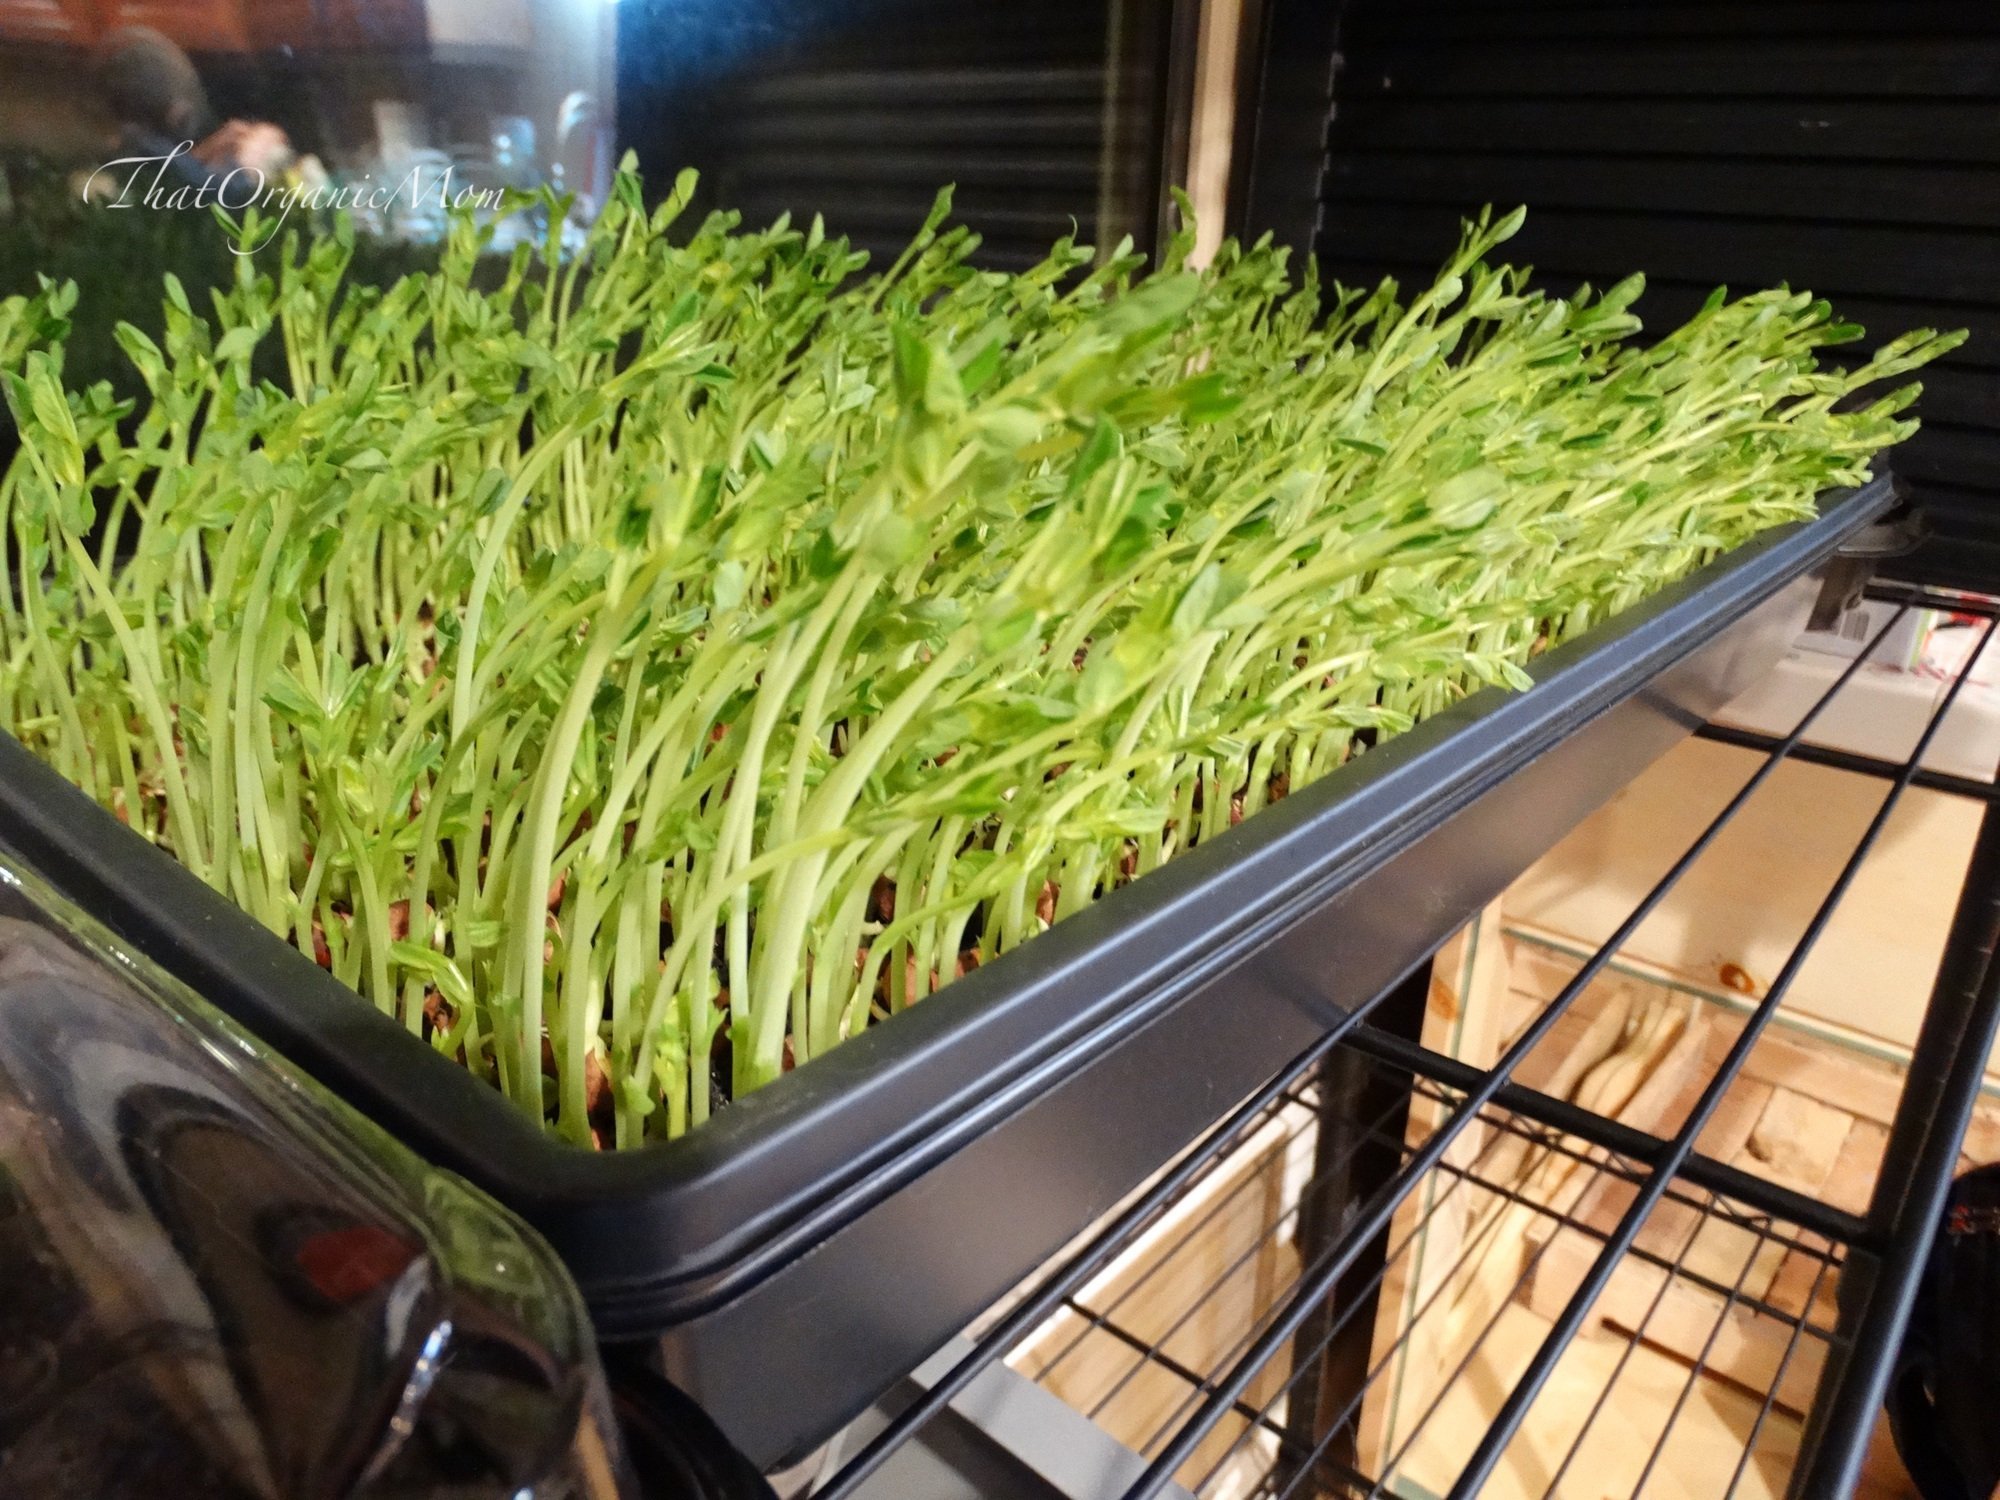
Growing pea shoots are probably the easiest to grow. Pea shoots grow from larger seeds and the shoots grow fairly tall compared to other microgreens. Snip them above the soil line and eat the same day for the highest nutritional value.
- Soak the seeds in water for 24 hours.
- Add the pea seeds to a tray or other container.
- Cover with growing medium.
- Water.
- Cover with another tray, inverted.
- Water daily and watch them grow.
- When shoots get about inches tall (about 8-10 days) they're ready to eat!
- Harvest by cutting with scissors about 1-1.5 inches above the base.
- Let the pea shoots grow, then harvest again!
Microgreens:
One of the best ways to save money is to grow microgreens indoors. Anyone can do it, even with only a small amount of space. Here's what to know about microgreens:
- are grown in soil
- require sunlight and ventilation to grow (a sunny windowsill will work just fine!)
- contain concentrated nutrients
- have unique flavors that pack a powerful punch
- are fairly easy to grow your own
- can grow in one to three weeks
- contain the first set of leaves but not fully grown
- leaves and stems are eaten
- are commonly used as a garnish
Sprouts:
- are grown without soil
- are germinated seeds
- can be harvested in less than a week
- need very little light to grow
- contain nutrients, enzymes, protein, and fiber
- stem and seed of sprouts are eaten
- adds crunch to whatever you put them on
Are Microgreens the same as Baby Greens
Also, noteworthy, microgreens differ from “baby greens” as they are cut earlier, at a younger stage. If one were to let a tray of arugula microgreens continue to grow, they could harvest baby greens. The same can be said for many other seeds.
How to Eat Microgreens, Sprouts and Shoots
Microgreens add visual appeal to a dish, which is why many chefs use them in the kitchen. They may have been put there for visual appeal, but they add a lot of value to the nutritional profile of your meal. Don't think of your own microgreens as simply a garnish.
They pack a lot into a tiny space. You'll find the same nutrients as the mature plants only more concentrated. Some studies say up to forty times more nutrients are contained in sprouts.
Eating sprouts is an efficient way to load up on vitamins C, E, K, Lutein and other essential nutrients. They contain fiber, protein, and enzymes too.
Microgreens are delicious in salads, on sandwiches, or to top a bowl of soup. Use your imagination to dream up lots of ways to incorporate microgreens into the dishes you create.
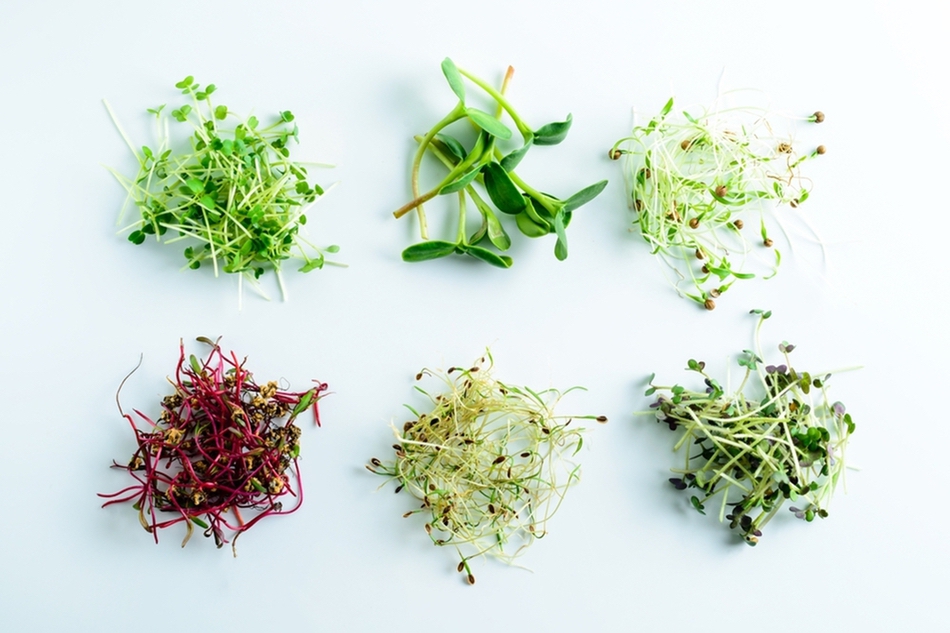
You can grow so many seeds into sprouts or microgreens
- alfalfa
- amaranth
- arugula
- basil
- bean sprouts
- beetroot
- broccoli Sprouts are one of the healthiest variety and are even better for you than full grown broccoli. They contain a compound found only in cruciferous plants. Research the health benefits of broccoli sprouts – you'll be amazed.
- buckwheat
- cabbage
- rainbow chard (when my rainbow chard seeds failed to sprout, I tossed them in the garden. They grew a bed full of full size rainbow chard!)
- chervil
- chia seeds are one of the most popular sprouts you may have seen in the Chia Sprouting Animal Shapes.
- cilantro
- cress
- daikon radish
- garlic chives
- kale
- komatsuna
- lentils
- lettuce
- millet
- mustard
- mizuna
- mung beans – If you've only ever tasted canned mung bean sprouts, you need to find some fresh ones to try. The taste is much better. Interestingly, mung bean sprouts can potentially lower blood glucose levels.
- parsley
- red cabbage sprouts – mild and beautiful to grow – they are usually deep red but come in a variety of colors. These make a salad green bowl look stunning!
- sage
- pea shoots
- salad mix
- spinach
- sunflower
- thyme
- wasabi nasturtium
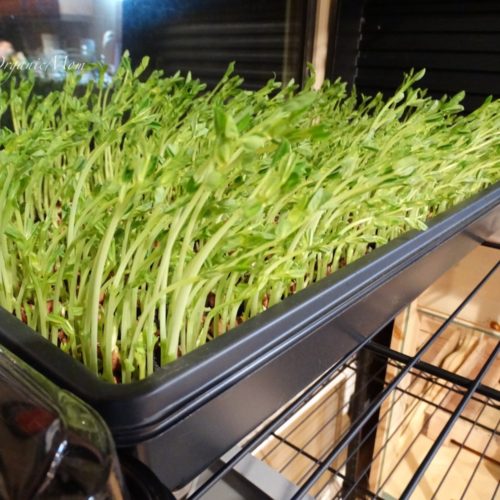
I love beet microgreens and radish for the tang and spice. However, one of my favorite microgreens is the pea shoot. Pea shoots lend an amazing flavor to salads and sandwiches. They are a little hardier than some of the smaller microgreens.
We've been making pea shoot salad since 2005. I would keep a tray of growing pea shoots on my kitchen counter. Pea shoots are a great starter microgreen as they are quite easy to grow. So if you'd like a DIY project that your kids can partake in, choose pea shoots! Make it into a study or a project for school.
Growing Sprouts in a Jar
You can also grow your own sprouts easily in a wide mouth canning jar. The glass jar can be kept on your countertop near the sink so you have the convenience of rinsing once or twice daily. A wide mouth mason jar is easier to use than the small mouth jars as the sprouts grow they will fill the jar, the wide mouth makes them easier to get out, just turn the jar upside down.
You can use the regular jar lid to grow your sprouts. Just secure a bit of cheesecloth over the opening with a rubber band or canning ring. A sprouting lid makes the cheesecloth unnecessary, if you want to invest in one, here's my amazon link.
Add a scant 2 tablespoons of seeds to the jar, soak, drain, rinse daily and set in a place where they will get sunlight but not become too hot. They still need a bit of air to circulate around them. This will be enough for you to enjoy a serving of fresh sprouts once or twice per day.
Sprouts can also be grown in a regular strainer or colander, although it's a good idea to keep them covered with a lid or cheesecloth.
Sprouting Beans and Legumes
I've also sprouted chickpeas and other legumes to reduce the phytic acid. This works the same as sprouting seeds, just soak, then rinse daily till the sprout is as big as you like. Mung beans are a good example of sprouting beans. If you toss them into your garden, you may end up with full grown bean plants. I've done this with alfalfa seeds, red clover, and chard seeds. We actually harvested rainbow chard from our veggie patch after I tossed out some uneaten sprouts. (I toss them when they start to age to avoid possible pathogens growing in them.)
Pea Shoot Microgreens Salad
INGREDIENTS
- 4-6 cups pea shoots
- 1 cup snow peas blanched
- 1/3 cup Coconut Aminos
- 1/2 teaspoon toasted sesame oil
- 1-2 teaspoons Sesame Seeds
- 2 tablespoons Rice Vinegar
- 2 teaspoons Honey
- dash Pepper Flakes
- Diced jalapeno optional
INSTRUCTIONS
- Blanch snow peas (remove sting if necessary)
- Add peashoots and snowpeas to salad bowl
- Mix the rest of the ingredients in a jar
- Pour dressing on peashoot salad and mix
- Enjoy
Microgreens are perfect for those who would love to grow some of their own food but do not have space, time, or energy for a full-blown garden. Microgreens can be grown in a sunny window in the kitchen, a small patio, or on a covered deck. The most important thing it takes to grow microgreens is sunlight.
To grow microgreens soak the seeds overnight. The following morning fill a tray with an organic potting mix, vermiculite, cocopeat, or worm castings. Drain the water from the seeds. Lightly spray the soil with water to wet slightly, spread the seeds on top of the mixture, pat down carefully then cover the seeds with a bit more of the soil, perhaps less than a quarter inch.
When microgreens have 2-4 leaves they are ready to harvest. Some types can be harvested several times. After the second or third time, the contents of the tray can be added to the compost, and a new batch can be started.
Wheat and Barley grass and other microgreens in the grass family can be grown in a tray lined with unbleached paper towels covered with about half an inch of soil.
Sprouts are fairly easy to grow as well but have a wider margin for error. To grow sprouts seeds are first soaked in water then drained, and rinsed frequently while they grow. Sprouts require humid conditions to sprout and grow; ironically these conditions are also ideal for the growth of certain bacteria. Like most fresh produce, there is a risk of bacteria.
If harmful bacteria are present in the seed bacteria can grow in sprouts. The FDA works with the industry to detect and reduce contamination.
Pea Shoot Microgreens Salad
Ingredients
- 4-6 cups pea shoots
- 1 cup snow peas blanched
- 1/3 cup Coconut Aminos
- 1/2 teaspoon toasted sesame oil
- 1-2 teaspoons Sesame Seeds
- 2 tablespoons Rice Vinegar
- 2 teaspoons Honey
- dash Pepper Flakes
- Diced jalapeno optional
Instructions
- Blanch snow peas (remove sting if necessary)
- Add peashoots and snowpeas to salad bowl
- Mix the rest of the ingredients in a jar
- Pour dressing on peashoot salad and mix
- Enjoy
FoodSafety.gov recommends cooking sprouts to kill any potentially harmful bacteria. Many people, myself included do eat sprouts without cooking. If you are pregnant, elderly, or a child, or if you have a weakened immune system the foodsafety.gov website recommends requesting that raw sprouts not be added to your food.
Reference:


 Getting Back Together After Separation
Leave a Reply
You must be logged in to post a comment.