Last Updated on June 29, 2022 by Rebecca Huff
I remember the first time I tried sushi, I'd never heard of it (I grew up in a small town and of course – no internet!) but I was adventurous and willing to try new things. We were at an upscale restaurant in Atlanta in the early 1990s and I've been hooked since that first bite.
I've lost track of how many of my friends and family tried sushi for the first time at my urging. Can't keep from sharing a good thing.
Thankfully, even though I've moved a lot over the years, I've always lived near a good sushi restaurant or two. I've tried sushi all over the world, including Japan, which is where the dish originated.
If you're like me, you would like to enjoy sushi more often, but don't want to eat out too much. That's why I taught myself how to make sushi at home many years ago.
Besides, nothing beats a sushi party and being a foodie, it's so fun to make it with friends or family and enjoy together. My sushi is a popular request for birthday parties, graduation parties, and other celebrations. Grab your sous chef and get ready for sushi making.
Americanized Sushi vs. Traditional Japanese Sushi
Japanese cuisine isn't all about sushi, and what you find in Japan is quite different from American-style sushi.
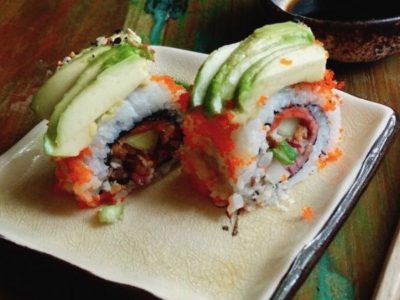
One difference is where the rice is in relation to the sheet of nori. In Americanized Sushi you'll find the rice on the outside; in Japan, the nori is on the outside. (The American version is an inside-out roll.)
In my photos, you'll see both rice on the outside and nori on the outside styles. For this post, I made it both ways to demonstrate, but when I'm just making it for my family I always do nori on the outside.
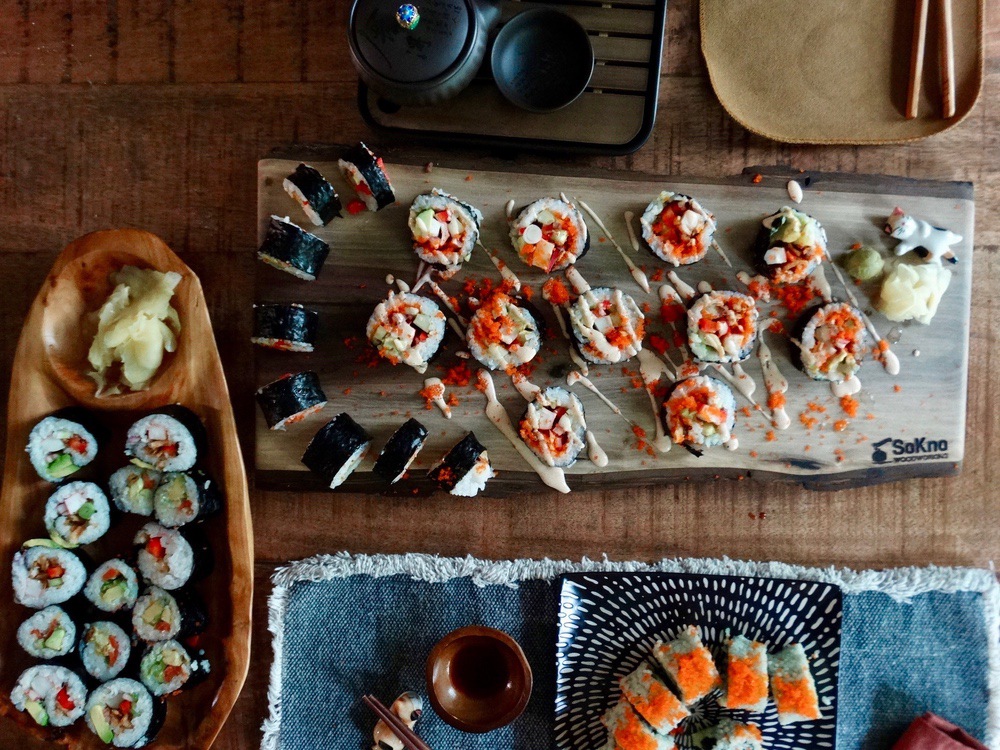
You may find it neater and easier to roll if you make your sushi with the sheet of nori on the outside. You can make it either way and I'll demonstrate both for you.
Another difference is that Japanese sushi tends to be minimalist whereas Americanized sushi is smorgasbord style and may contain many different ingredients. Sauces and toppings are more common in American-style sushi.
Health food restaurants and stores may carry another type of Americanized sushi that uses brown rice or even quinoa. In Japan, short-grain white rice is used exclusively.
Use the right terms
Say “sushi” in America and people think “raw fish” however in Japan the word sushi literally means “sour-tasting” and refers to vinegared rice. Sashimi is raw fish and is a good choice for anyone avoiding carbs but still wanting to enjoy Japanese cuisine. On that note, for those who dislike nori, order “nigiri” which is raw fish on top of the vinegared rice.
- sushi – vinegar-flavored cooked rice served with a garnish of fish, vegetables, or egg.
- maki – sushi and raw vegetables wrapped in seaweed called nori
- uramaki – inside out roll with the rice on the outside
- sashimi – bite-sized pieces of raw fish usually served with soy sauce and wasabi
- nigiri – a bit of rice with just a touch of wasabi, topped with fish (raw or cooked)
We're focusing on Maki in this post. Now that we've cleared that up, are you ready to make your own sushi at home?
Learn how to make sushi at home
There are some tools and ingredients you will need. A comprehensive list of Japanese Pantry Staples along with a printable shopping list can be found here. I've also included the basic ingredients for making sushi below.
Start with simple maki rolls that use one filling, such as a slice of cucumber or a crabstick. Once you learn the art of rolling, add other ingredients. A California roll has three filling ingredients, cucumber, crab meat, and avocado. These single-ingredient rolls make wonderful appetizers.
If you venture into the world of raw fish, make sure you get sashimi-grade fish (or sometimes referred to as sushi-grade fish.) What you don't want to do is go to the meat counter and grab a piece of fresh or previously frozen fish.
Sushi-grade fish freshest is the highest quality raw fish; additionally, it is always treated with extra care to reduce the risk of foodborne illnesses. It's important to note, however, in America sushi-grade is not an FDA-regulated term. Fish suppliers and chefs use the term commercially. So if you see tuna or salmon packaged as “sushi-grade” or “sashimi-grade” you'll know what that means.
Although there are many misunderstandings and myths about the safety of raw fish, to err on the side of caution, I typically do not use raw fish when making sushi at home. Besides, once you pay for high-dollar sushi-grade fish, you may as well go to a restaurant with a professionally trained sushi chef.
Tools to make sushi
We like to use the classic bamboo mat method, which I've been doing for about 18 years. Check your local Asian supermarket to pick up the tools for making sushi, or you can get everything you need for sushi making in this bundle.
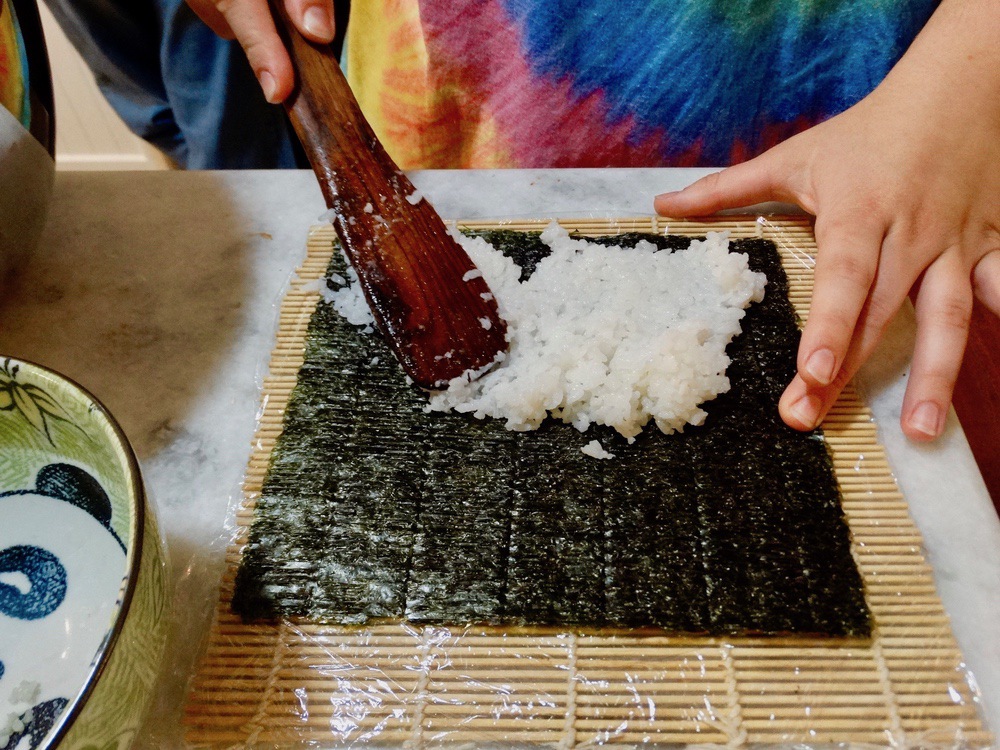
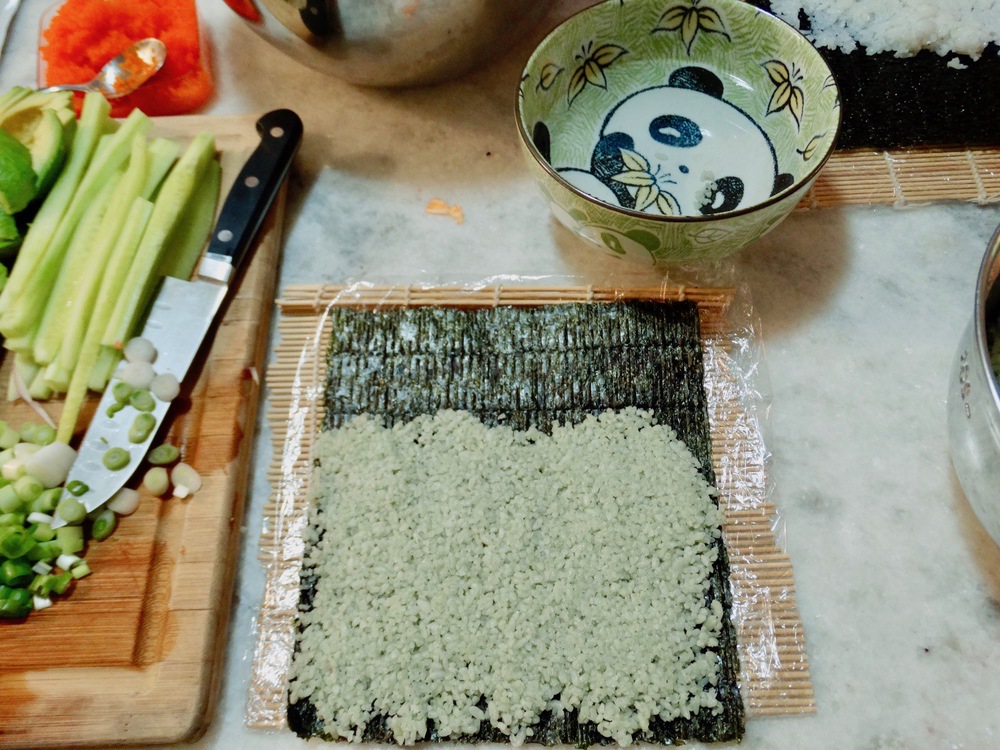
I don't like to use plastic, and did so in this post for demonstration purposes only. The wooden paddle my daughter Ivy is using in the photo above was made by my dad as a butter paddle but I've adapted it for making sushi!
- sharp knife
- bamboo sushi mat
- cutting board
- large bowl (for mixing rice)
- rice cooker, (optional but sure is handy)
- rice paddle
- plastic wrap (optional, I do not use it)
Beginners may want to start out with a sushi-making kit or at minimum a bamboo mat. It's not impossible to make sushi rolls without the bamboo mat, I find myself rolling without the mat pretty often. If you don't have a mat, try using a piece of parchment or wax paper
For anyone who makes a lot of sushi or has a large family, the Zojirushi rice cooker is a serious time saver. I've had my 5.5 cup capacity Zojirushi Umami Rice Cooker since August 2012 and it's still going strong. That's almost 10 years.
How I prepare perfect sushi rice every time
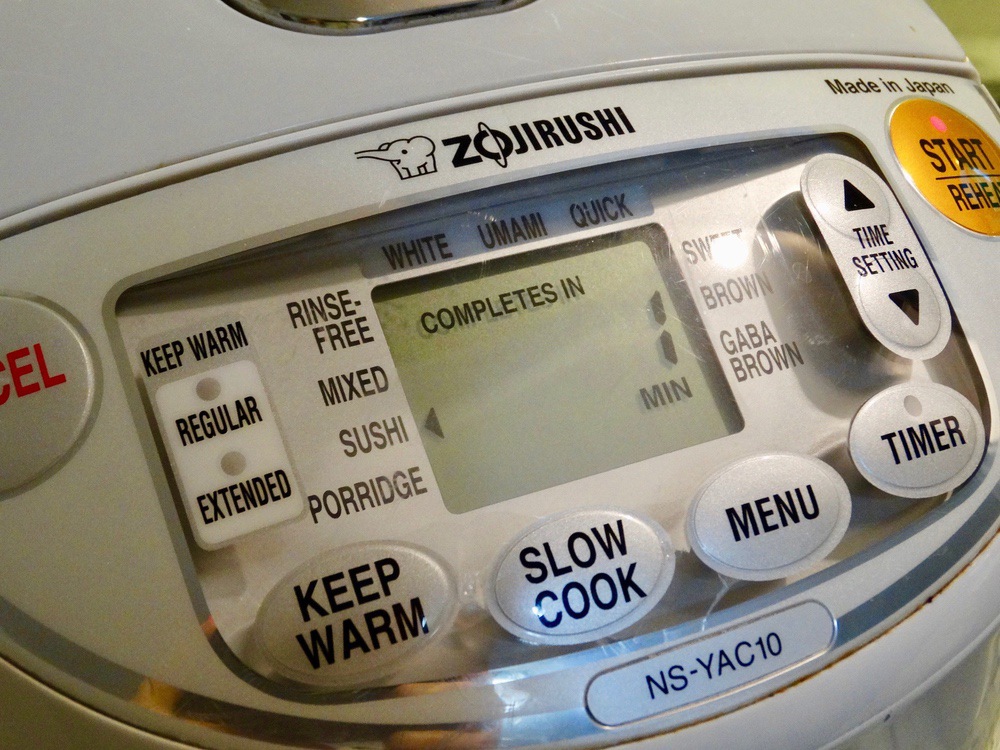
The Umami Micom Rice Cooker (pictured below) and warmer comes with Zojirushi's Umami setting that soaks and steams the rice longer for enhanced flavor. It also has a Slow Cook function that allows the rice cooker to work like a slow cooker. There is a setting on the cooker for sushi rice which makes the process as easy as touching a button.
It's an investment, but if you plan to make sushi a lot, then it's worth every penny. You might think it odd to have a machine just for rice, but consider the fact that you'll never forget a pot on the stove, scorch it, or ruin your rice again. In addition, the rice cooker can be used for making other foods as well, although I rarely do. My kids enjoy having warm rice available and the “keep warm” setting allows me to do that.
If you are a single or even a couple and would like a smaller version, Zojirushi makes smaller sizes along with a bunch of other appliances. You probably already guessed by the name, but the company is based in Japan.
Choosing Sushi Rice
You may or may not find sushi rice at your local grocery store. We shop at local Asian grocery stores, Earth Fare, Whole Foods, and online.
Below are the brands we typically use, but there are so many available, look for a quality brand and buy a small bag. If you like it, next time you can go for a bigger bag to save some money.
Tamaki Gold is hands down my favorite sushi rice. It's a bit on the pricey side, but you can't beat the quality. When I buy this in my local (Korean) Asian Supermarket, the cashier always fusses at me for spending so much money on “expensive rice” and I have found it cheaper on Amazon, but I still buy it locally.
Tamaki Gold has a very moist kernel that has the perfect stickiness and holds its flavor and firmness over periods of time. It should be part of every sushi experience
Other brands we use:
- Tamanishiki – look for this at the local Asian Supermarket
- Uonuma, Yuki Tsubaki Koshihikari White Rice
- Organic California Sushi Rice by Lundberg Farms (this one can be found at Whole Foods, Earth Fare, etc.)
- Shirakiku Rice Koshihikari
The green rice in some of my photos is short-grain white rice with bamboo extract. It's made by Lotus Foods Jade Pearl Rice which can be found at Thrive Market, Whole Foods, Earth Fare, Amazon and other health food stores.
These brands of rice and other items for making sushi can be found on my Japanese Cooking list on Amazon. Rice is gluten-free and is a good substitute carbohydrate for kids who can't eat wheat gluten. My kids love rice and enjoy it weekly.
Making the Sushi Rice
The most important part of cooking perfect rice is getting the water to rice ratio correct. Use one-to-one water to rice ratio when making short and medium grain rice. If you use a rice cooker, you can simply fill the water to the designated line.
The total time for cooking the rice in a rice cooker may be a bit longer than on the stovetop, but there is less margin for error. If you choose to cook rice in a pot, just keep an eye on it and don't let it boil over.
No matter how you cook your rice, the first step is always to rinse the rice until the water runs clear.
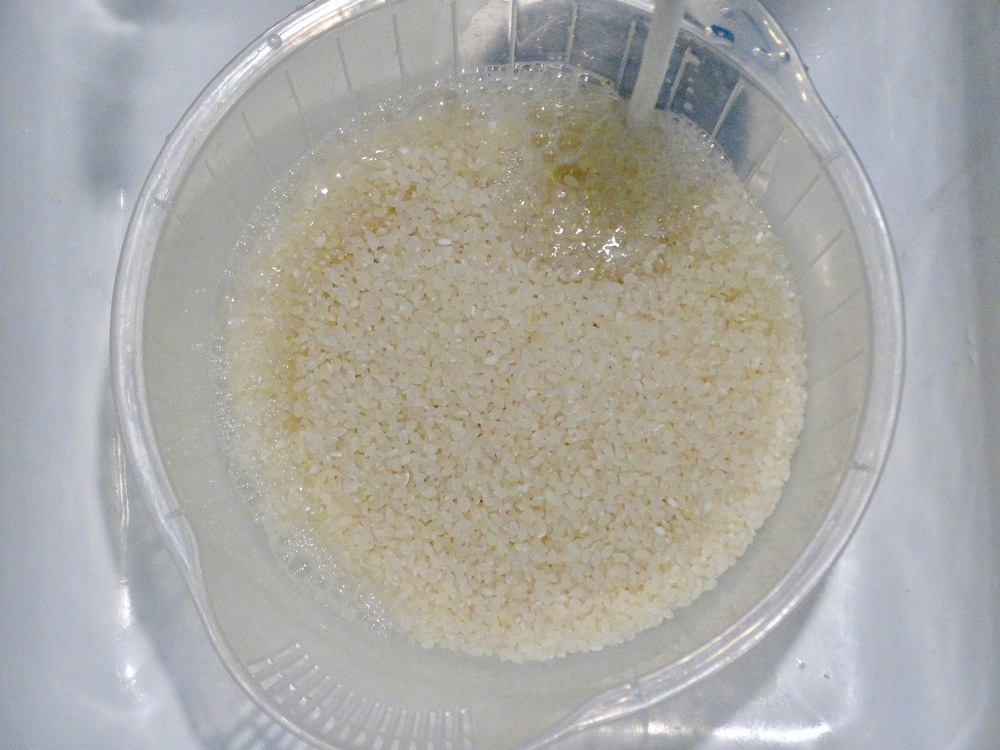
Most experts recommend allowing the rice to soak in cold water for 30 minutes prior to cooking. This is said to allow the rice to rehydrate and prepare it for cooking. Most of the time, I skip this step, especially when using the Zojirushi rice cooker.
With a rice cooker, you simply rinse the rice, then add to the bowl, fill to the line indicated with water, then press the menu button till “sushi rice” is selected, then press start. Easy peasy.
To make the rice in a pot:
- add 3 cups of rinsed and soaked rice plus 3 cups water to a medium-sized pot
- put the pot on the stove and turn the heat onto high bringing the rice to a boil
- reduce the heat to low and cover with a lid
- allow the rice to cook for 15 minutes
- turn off the heat without removing the lid to allow the rice to steam for 10 minutes
While the rice is cooking, prepare the seasoning
You can significantly reduce the prep time if you multi-task by preparing while the rice is cooking. First mix the seasoning you'll use in the rice. (You can buy pre-seasoned rice vinegar, but it may have unhealthy ingredients added, which is why many people prefer to season their own.)
- add vinegar to a small bowl
- add salt and sugar
- stir until dissolved (if the sugar doesn't dissolve, heat the liquid slightly)
- mix this seasoning mixture with the rice, fold it over and gently stir until the rice is shiny and room temperature
If you are using the Zojirushi rice cooker, you can add a bit of kombu or umeboshi (pickled plum) to the water during cooking to add flavor to the rice. The Eden Food Brand is the one I usually find in Earth Fare or Whole Foods, but you can also get it on Amazon. (I am obsessed with umeboshi plums for their salty-sour taste, but they are also good for detoxifying the liver! If you have problems with digestion or need a hangover cure, they work for that too.)
Homemade Sushi
Some of the basic homemade sushi rolls include:
- California Roll (cucumber, avocado, crab)
- Philadelphia roll (smoked salmon, avocado, cream cheese)
- Tamago (and egg roll – use this tamagoyaki recipe to prepare the egg filling)
My husband and some of my children enjoy cream cheese in their rolls, Philly style rolls but I don't like it at all – maybe a texture thing but to me cream cheese goes on everything bagels, but maybe that's just me.
Food ingredients
Your local grocery store will have most of the ingredients you'll need to make sushi, although “sushi rice” might not be on the shelf. Look for short-grain rice, or in some cases, you may find some medium grain rice works. Try exploring the local Asian Supermarket or mom-and-pop shops to find what you're looking for.
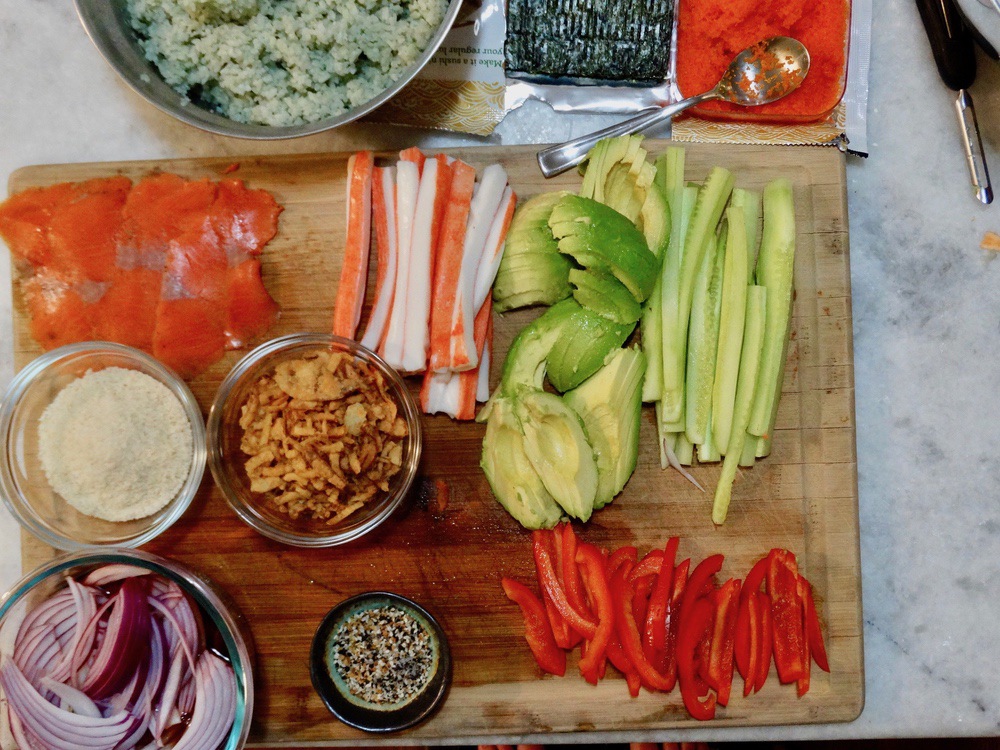
Basic ingredients used to make several popular variations of maki rolls.
- short-grain rice (soft, plump, sticky – don't try to use long grain rice!)
- nori – seaweed sheets
- rice vinegar – seasoned or unseasoned*
- wasabi – powdered to mix with water or already prepared
- soy sauce – can sub tamari or coconut aminos
- sesame seeds – white, black or both (we often use everything bagel seasoning in our sushi!)
- green onion
- crab meat – preferably real but most people use imitation and that's what you'll see in most California rolls
- sushi-grade fish – must say sushi-grade – do not buy over-the-counter previously frozen and thawed fish!
- bell pepper, cucumber, and other veggies if you like
- spicy tuna (make your own)
- thin slices of pickled ginger, optional
- spicy mayo – optional, or make your own
- yum yum sauce (or make your own)
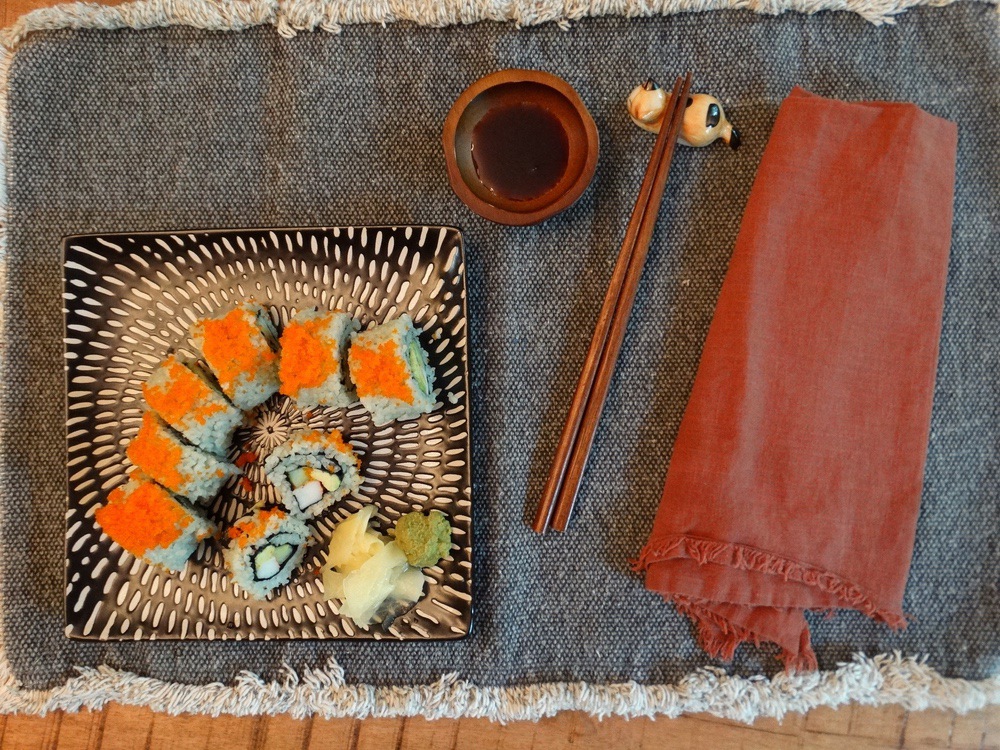
Tutorial for the perfect sushi rolls
Remember I told you that in Japan, the nori goes on the outside?
If you choose to make your rolls this way, you'll find it a bit easier to wrap and slice them. However, if you want to do inside-out rolls, it's not hard to do, and you may want to start with a sushi mold. Some people prefer the nori on the inside and the tasty rice on the outside. No judgment here!
When I taught my kids to make sushi, I found it was easier to wrap the nori on the outside, and doing it this way means you won't need plastic wrap and I'm all about eliminating plastic so if you choose to go this route here's the technique I use.
- Start with a sheet of nori, rough side up
- Using a rice paddle, add rice to the bottom half of the nori sheet (spread into a thin layer with the paddle or with wet hands)
- Spread the rice to the edges of the nori, being careful not to rip
- Starting at the bottom, add the filling in a neat row
- Beginning with the edge closest to you, roll tightly enclosing the filling ingredients
- Seal with a touch of water (not too much or the nori will disintegrate)
- Slice in half, then in quarters, then in eights (don't start at the end and slice to the other end, instead, cut the entire roll in half, then each of those halves in half, etc. This way the fillings won't slide out the end!)
If you want to do the rice on the outside method, you'll probably have more luck with a rolling mat wrapped in plastic wrap or a sushi mold like the ones in this kit. There are two kinds, the mold kit or the classic kit (which I use in these photos.)
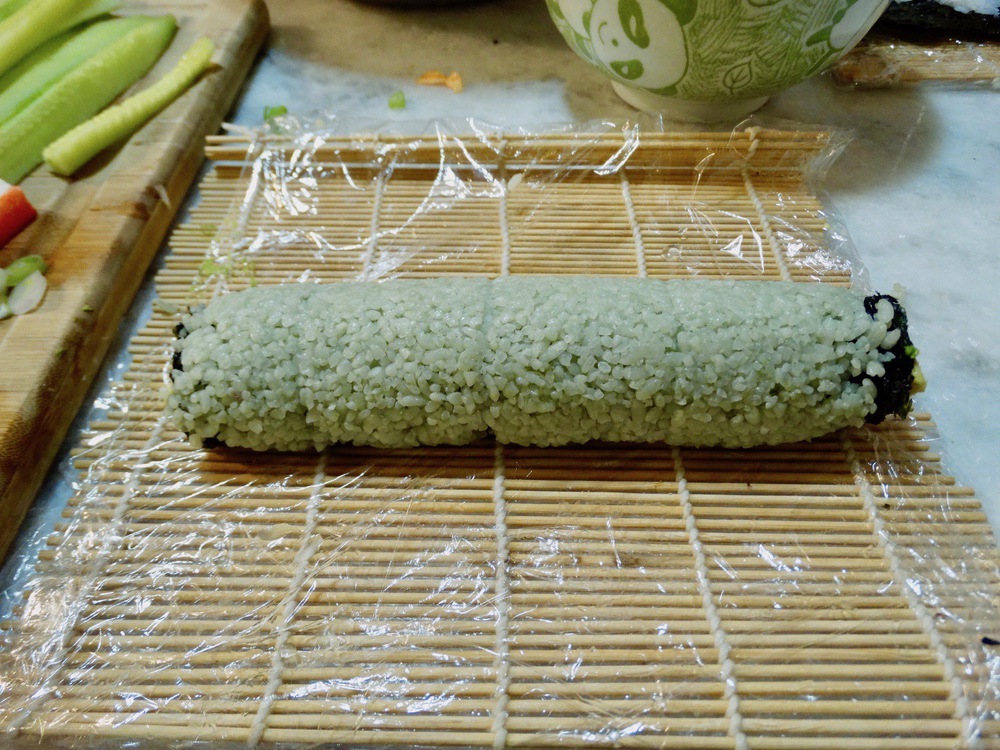
For rice on the outside, you'll can use a half sheet of nori.
Cutting without making a mess
I keep a small bowl of water near my cutting board to wet my knife and a warm wet dishcloth in case my knife gets gummed up with sticky rice. If you've ever sat at a bar at a sushi restaurant, you'll see the chef keeping his knife blade clean at all times. A sticky blade won't give you clean cuts, neither will a dull blade.
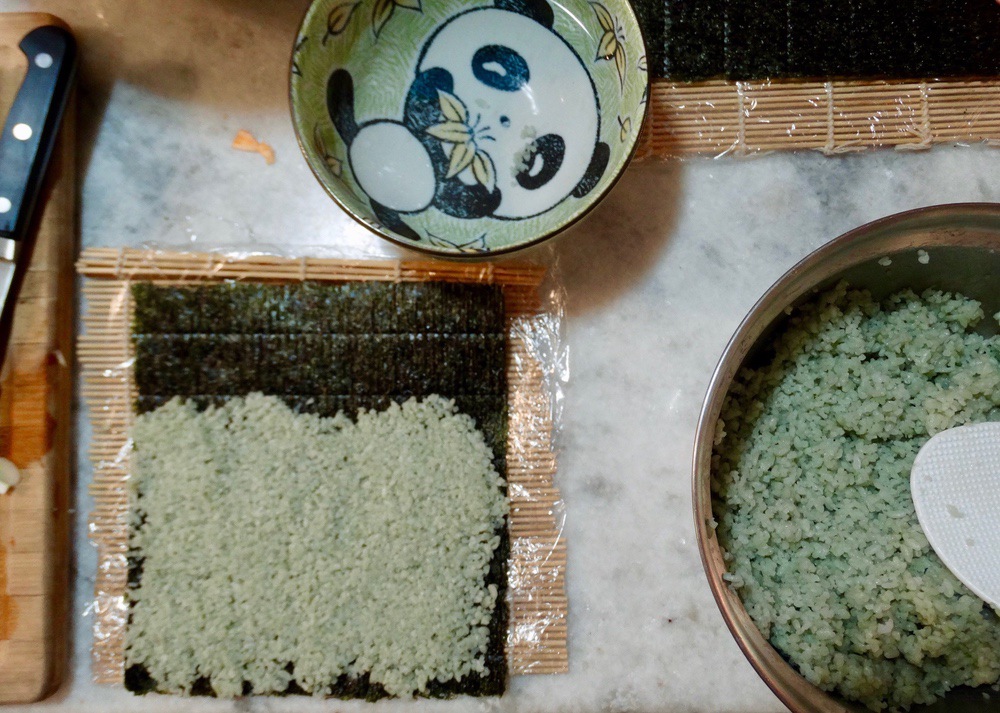
Start with your sharpest knife. (Did you know there is a greater risk of hurting yourself with a dull knife than with a sharp one?)
For a full sheet of nori rolled, you should cut it in half, then in quarters, then in eighths (don't start at the end and slice to the other end like you would with a carrot. Instead, cut the entire roll in half, then each of those halves in half, etc. This way the fillings won't slide out the end!)
If necessary, rewet and wipe your knife blade to keep it clean in between cuts.
How to serve
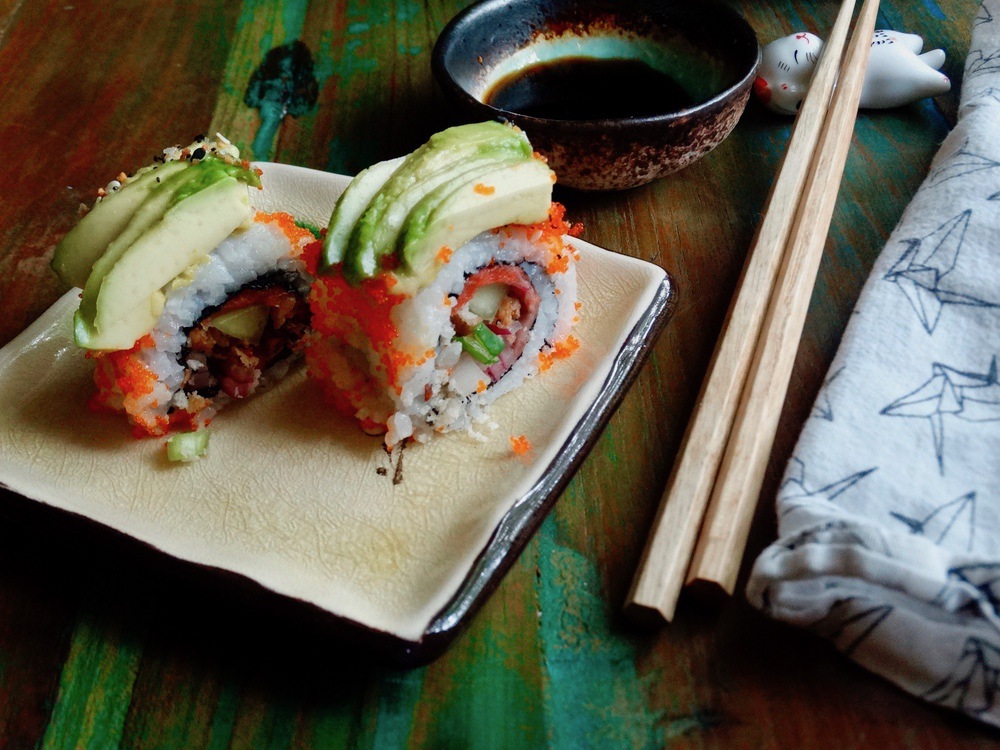
Mix wasabi powder with few drops of water until you get a consistency that will roll into a ball. Shape and form it, add it to the side of your sushi platter or plate. Add a bit of pickled ginger, if you like it, to the plate and fill a small dish with soy sauce (or coconut aminos) in which to dip the sushi.
We like to use chopsticks, but I've seen many people just eat sushi like a finger food, with their hands; others use a fork. Whatever works for you.
Other Variations to try
There are so many yummy variations and combinations, let your imagination be your guide. Start with some basic rolls and get used to making good vinegared rice, tight rolls, and clean slices, then you're ready to experiment with new flavors and styles.
Tempura Rolls
Tempura is batter-dipped and fried vegetables, fish, or meat. While tempura is pretty tasty, I try to limit how much I fry foods. If you like tempura inside rolls and don't mind the mess of frying, go ahead and give it a try! Recently we used baked coconut shrimp inside of sushi rolls and it was amazing. Drizzle a bit of Ginger People's Sweet Chili on top.
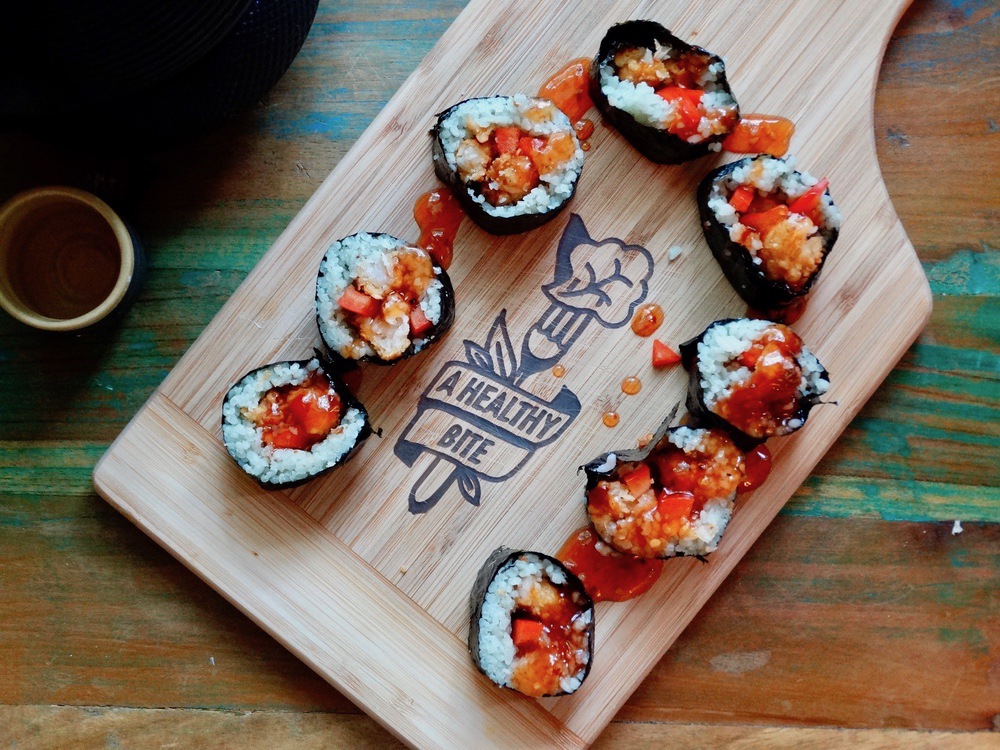
With the right tools and ingredients, you'll be making your own sushi in no time.
My Family Size Homemade Sushi
Ingredients
- 3 cups short grain rice (medium grain works too)
- 3 cups water
- 6 tbsp rice vinegar
- 3 tbsp sugar
- 3 teaspoons salt
FILLING INGREDIENTS
- smoked salmon
- crab meat
- cucumber
- avocado
- cream cheese
- pickled onions
- french fried onions
- green onions
CONDIMENTS
- soy sauce
- pickled ginger
- wasabi
- masago (fish roe)
Instructions
Cooking Rice in a Pot on the Stove
- add 3 cups of rinsed and soaked rice plus 3 cups water to a medium-sized pot
- put the pot on the stove and turn the heat onto high bringing the rice to a boil
- reduce the heat to low and cover with a lid
- allow the rice to cook for 15 minutes
- turn off the heat without removing the lid to allow the rice to steam for 10 minutes
Making Sushi Rice
- add vinegar to a small bowl
- add salt and sugar
- stir until dissolved (if the sugar doesn't dissolve, heat the liquid slightly)
- mix this seasoning mixture with the rice, fold it over and gently stir until the rice is shiny and room temperature
Notes
Thanks for sharing this post on Pinterest!

 Best Shampoo for Dry Scalp That Finally Eliminated Flaking