Last Updated on May 11, 2024 by Rebecca Huff
How to Make Homemade Cream Cheese
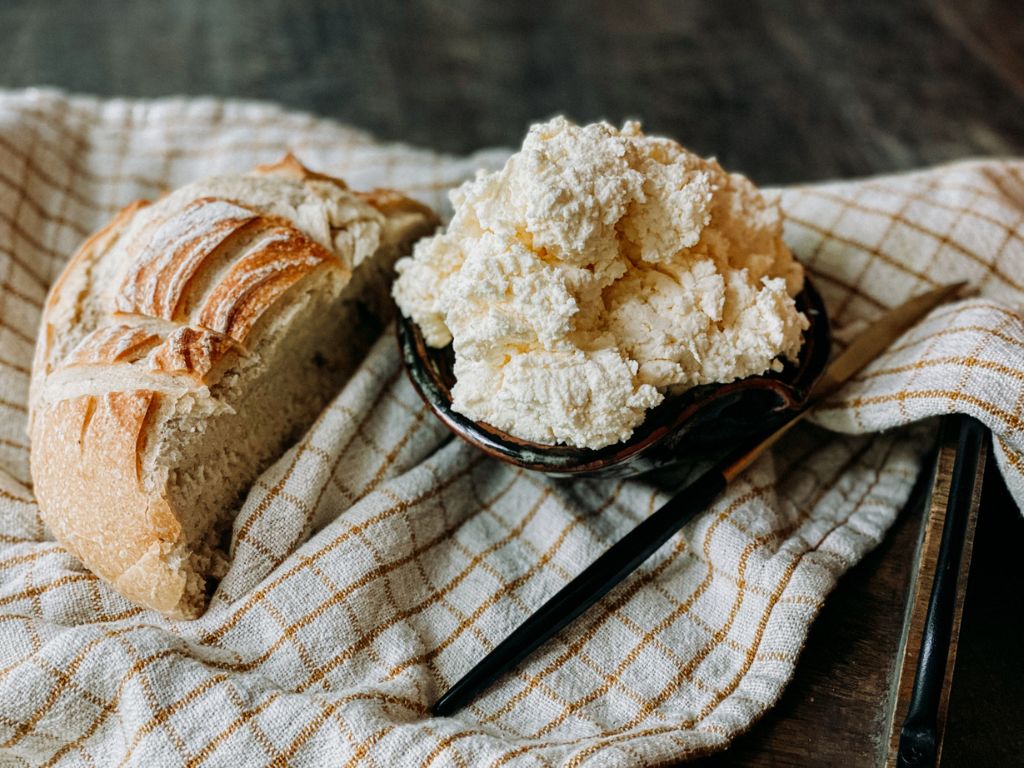
If you want to learn how to make homemade cream cheese, you’ll be happy to know that it is one of the easiest cheeses and,therefore a great place to start.
Once you’ve made your own cream cheese, you’ll feel like you can do anything! It’s such a fun and exciting accomplishment.
Perhaps you’ve tried my Everything Bagel Recipe and discovered the joy of freshly baked bagels. If so, you know how much better homemade can be. With such a fresh and delicious bagel, you’ll want the best-tasting spread. That’s precisely why I taught myself to make homemade cream cheese.
Trust me, you can make homemade cream cheese to go with your favorite bagels even if you’ve never made cheese before. I have made this multiple times with nothing more than the instructions on the culture packet.

Homemade Cream Cheese Recipe with Starter Culture
The most crucial part is choosing full-fat milk or a combination of dairy products that are not low fat and not ultra-pasteurized. In my youtube video, you’ll notice I’m using a gallon jug of whole milk and it looks very yellow because of the heavy cream that has risen to the top of the jug.
The milk comes from Cruze Dairy Farms in Knoxville, but you can use whatever you can find near you. Although, I encourage you to look for a local dairy to obtain super fresh, high-fat milk for making homemade cream cheese.
What You’ll Need:
- pot big enough for up to a gallon of liquid
- organic cheesecloth for straining the curds (I recently found this GOTS-certified organic cotton reusable cheesecloth so I am not throwing anything away!)
- bowl to catch the whey
- colander or strainer to hold the curds in cheesecloth
- thermometer to get the milk to the right temperature
- an airtight container to store the cream cheese in
- 1-4 quarts of whole milk, heavy cream, or a combination (not ultra-pasteurized) and also with a high-fat content – When choosing your dairy products, try to use fresh cream if possible; the fresher, the better.
- cream cheese starter culture powder (coagulant or mesophilic aromatic culture with rennet)
- Cheese salt or kosher salt – Non-iodized salt (I used Redmond’s Real Salt, which is not iodized but does contain a small amount of naturally occurring iodine.)
The cream cheese recipe and starter culture that I use is from Cultures for Health. You’ll receive step-by-step instructions for making delicious cream cheese at home with simple ingredients when you order the culture packets.
Basic Homemade Cream Cheese Instructions:
- Heat the milk slowly, to 86°F on the lowest possible setting.
- Remove the milk from the heat and stir in the cream cheese culture mixture packet with an up and down motion, not round and round. [Do not stir longer than 15 seconds.]
- Cover the pot and leave the mixture to culture at room temperature for 12 hours (about 72° – 77°F.)
- After 12 hours, your milk will curdle. Remove the lid; the cheese is fairly solid but still relatively soft and resembles yogurt. This is normal and is what makes milk become cream cheese. The whey (clear or cloudy liquid) is separating from the cheese. (Save the whey for other uses if you like. *see below)
- Next, drape a piece of doubled muslin in the colander set over a bowl. (I clip the edges of muslin to the bowl to hold it in place.) Carefully pour or spoon the cultured milk into the prepared container.
- Gather up the corners of the muslin, use cotton string to tie these together, then hang from a hook or knob, allowing the whey to drip into a clean large bowl (you can use the leftover whey, too!)
- After 6-12 hours, the cream cheese will reach a thicker consistency. (The longer you allow it to drain, the more it will thicken.)
- Salt the cream cheese and store it in an airtight container.
While the total time for making homemade cream cheese is about 24 hours, the prep time is minimal. The cook time is only the amount of time it takes to heat the milk to 86 degrees Fahrenheit.
The result is a deliciously tangy spreadable cheese that beats any store-bought out there.
Ideas for using your fresh homemade cream cheese
- Cream Cheese Frosting on top of home-baked carrot cake
- Bagels with Cream Cheese (try mixing the cream cheese with chives or scallions, oh my!)
- Cucumber Cream Cheese Tea Sandwiches
- Cheese Cake
- Cocoa Wonder Wraps with Cream Cheese & Strawberries
- In any recipe that calls for cream cheese
Other tips
I’ve seen other recipes that include white vinegar, lemon juice, or even buttermilk; however, this seems to be the most straightforward way to make delicious homemade cream cheese time after time.
My first time making homemade cream cheese was a complete success. I couldn’t believe how easy it was. The resulting product doesn’t resemble the waxy Philadelphia cream cheese you find in the supermarket but a fresher and slightly fluffier version.
You can watch me make my first batch of cream cheese on this Instagram Reel and my second batch on my YouTube video here. The third time I made this using heavy whipping cream from a different dairy farm, it was just as good.
Traditional cream cheese is made from 50% cream and 50% whole milk. Use all heavy cream for the richest tasting cream cheese. For a lower fat cream cheese, use whole milk.
Remember to heat the milk slowly; heating it too fast will cause the milk not to set and you won’t get a good curdle, which means runny cream cheese at best. Take your time, and you’ll get great results.
Uses for Whey
The first couple of times I made homemade cream cheese, I poured the whey into my worm bin. It worked out just fine. However, I wanted to use it, so I decided to pour it into a minestrone pot the next time, giving it such a good flavor.
Here are a few more ideas for what to do with leftover whey:
- feed some of it to farm animals or pets
- use it in the place of broth
- add it to mashed potatoes (or cauliflower)
- use it instead of water when baking bread
- dilute it and use it to water plants

Homemade Cream Cheese
Equipment
- heavy bottom cooking pot to warm and curdle milk
- organic cheese cloth to tie up curds in for straining
- large bowl to catch whey as it drips
- colander or strainer to hold curds as it drains
- cooking thermometer to measure temperature at 86 degrees Fahrenheit
- air tight container for storage
Ingredients
- 1-4 quarts whole milk or cream
- 1 packet cream cheese starter culture
- kosher salt to taste
Instructions
- Heat the milk, slowly, to 86°F on the lowest possible setting.
- Remove the milk from the heat and stir in the packet of cream cheese culture mixture with an up and down motion, not round and round. [Do not stir longer than 15 seconds.]
- Cover the pot and leave the mixture to culture at room temperature for 12 hours (about 72° – 77°F.)
- After 12 hours, your milk will curdle. Remove the lid and you’ll see the cheese is fairly solid but still relatively soft and resembles yogurt. This is normal and is what makes milk become cream cheese. The whey (clear or cloudy liquid) is separating from the cheese. (Save the whey for other uses if you like. *see below)
- Next, drape a piece of doubled muslin in the colander set over a bowl. (I clip the edges of muslin to the bowl to hold it in place.) Carefully pour or spoon the cultured milk into the prepared container.
- Gather up the corners of the muslin, use cotton string to tie these together, then hang from a hook or knob, allowing the whey to drip into a clean large bowl (you can use the leftover whey, too!)
- After 6-12 hours, the cream cheese will reach a thicker consistency. (The longer you allow it to drain the more it will thicken.)
- Salt the cream cheese and store in an airtight container.
Video
Notes
- feed some of it to farm animals or pets
- use it in the place of broth
- add it to mashed potatoes (or cauliflower)
- use it instead of water when baking bread
- dilute it and use it to water plants


 Genetic Testing at Home – My Review of SelfDecode